
Cable management for some of us is the bane of our existence. For us technology
fanatics, we find it weirdly quite exciting. No matter where you stand
between these two viewpoints, you’ll have to admit that there is nothing
nicer than a clean, organised work space.
Wondering how to achieve
this? Here’s everything you need to know about keeping your cable
management on point!
 | |
| Source: Flickr |
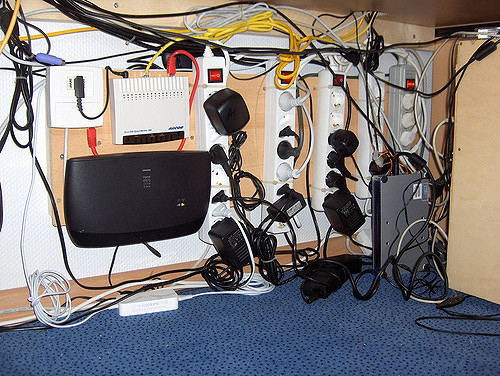
Start By Unplugging Everything
If
the back of your desk looks more like a spaghetti junction rather than
an organised queue, then you’re going to need to start afresh. Begin by
unplugging everything and separating things into devices and cables.
Once you’ve managed that, and your entire desk is clean, begin to pair
each device with its relevant cable(s). Now that is sorted, you can
begin to put everything back into place.
Source: Flickr
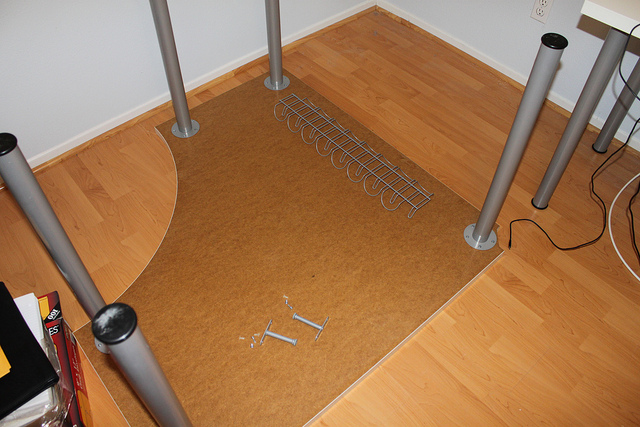
Plywood, Duct Tape and Cable Ties
Before
you take any further steps, however, you’ll need to do this! Our
technique is a cheap, easy quick-fix straight from the cheat sheet of
cable management. We purely chose to opt for this method to save you guys some time and money. All the cable management solutions
found in stores are often ugly, not all that discreet and overpriced.
So, here is a trick of our own! Go out and buy some plywood, a sheet big
enough to cover the base of your desk is ideal.
Then go ahead and drill this to the bottom of your desk, leaving enough space for your multi-adaptors, cables, and power bricks to sit above it. Now you can begin to reconnect all of your devices, and return your desk to its previous look. Hopefully, a lot of what was previously visible from below your desk is now away from your eyeline.
This will provide and extremely clean and sophisticated look. There still might be some mess at the back of your setup, however. Use cable ties to group your remaining cables that run towards your AC port together. These can then be secured with duct tape to stop them loosening over time. You should then be left with a clean desk, with no visible cables - bliss!
Source: Flickr
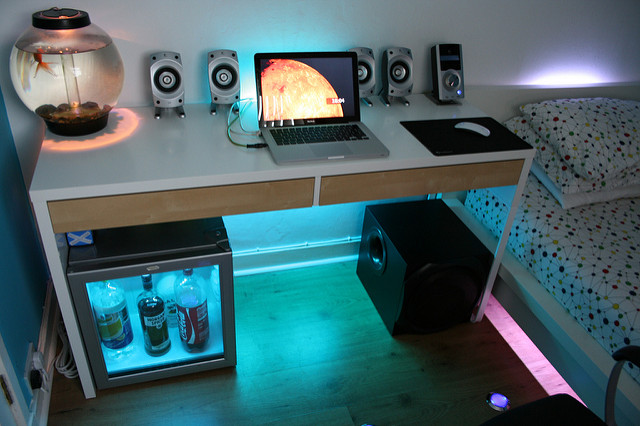
Voltage Optimisation
Your
setup now looks clean, but is it beginning to cost you a load of money
each month on your energy bills? Also, with all of those cables bundled
together on top of the plywood, are things starting to get a little
toasty? If you’re suffering from either of these problems and wish to prolong the lifespan of your devices,
then voltage optimisation is for you.
Network providers naturally dish out power at a high voltage to ensure support for all sorts of devices. However, the devices you are powering under your desk will likely require nowhere near the power of a pair of hair straighteners. For that reason, you need to cool things down to stop fuses blowing and systems overheating. Companies such as Captech provide voltage optimisation devices. These are to ensure that your setup can remain cool, use less power, and save you more money. Neat, right?
Network providers naturally dish out power at a high voltage to ensure support for all sorts of devices. However, the devices you are powering under your desk will likely require nowhere near the power of a pair of hair straighteners. For that reason, you need to cool things down to stop fuses blowing and systems overheating. Companies such as Captech provide voltage optimisation devices. These are to ensure that your setup can remain cool, use less power, and save you more money. Neat, right?
Hopefully,
this post has helped you get your cable management game going strong.
If any of these tips worked for you, then let us know! We’d love to hear
about your setups.


No comments:
Post a Comment